安裝Android & Appium測試環境 (Windows)
![emulator_check](https://user-images.githubusercontent.com/29251855/37717852-61d00758-2d5c-11e8-810e-6fd1e14bddba.png)
這篇會介紹如何在Windows系統安裝所有Android自動化測試環境
包括Appium、Android手機與模擬器
建立Android測試環境可分成三部分:
Part1: 準備 Android測試環境
- 安裝 Python
- 安裝 Java
- 安裝Androdi studio
- 設定Android模擬器
- 設定Android手機
Part2: 安裝 Appium GUI Server
- 安裝Appium GUI Server
- 設定GUI Server啟動Android模擬器
- 設定GUI Server啟動Android手機
Part3: 安裝 Appium Console Server
- 安裝Node.js
- 安裝Appium Console server
- 啟動Appium Console server
安裝與設定 Python
- 到官方網站下載 Python 3.6
https://www.python.org/downloads/
![python36_inst](https://user-images.githubusercontent.com/29251855/37714553-c0735a88-2d54-11e8-8c01-560f2546e990.png)
![python_inst2](https://user-images.githubusercontent.com/29251855/37714575-d40fb6a4-2d54-11e8-92e4-035600cde48f.png)
- 設定 Python 環境變數
新增一個系統變數PYTHONPATH3
, 加上路徑
C:\Python36;C:\Python36\Tools\scripts;C:\Python36\DLLs;C:\Python36\Lib; C:\Python36\libs;C:\Python36\Scripts
- 將
;%PYTHONPATH3%
加入到Path 環境變數
![pythno3_pathvar](https://user-images.githubusercontent.com/29251855/37714744-45fbd11c-2d55-11e8-8c63-fafbe07dd6cf.png)
- 驗證Python 安裝
在CMD中輸入python -V
驗證是否安裝成功
![python_pip-verify](https://user-images.githubusercontent.com/29251855/37714813-73474caa-2d55-11e8-84cf-02722252235a.png)
- 安裝Pycharm for Python IDE開發環境
到JetBrain官網下載Pycharm
https://www.jetbrains.com/pycharm/download/#section=mac
安裝與設定 Java
- 開啟瀏覽器, 搜尋 Download jdk 8
下載Windows x64後完成安裝
![windows_jdkdownload](https://user-images.githubusercontent.com/29251855/37693529-4ed8099a-2cfb-11e8-87bf-2b93cdf8e90b.png)
- 建議將你的JDK和JRE分開來安裝在獨立的路徑 ex. C:\Java
![jdk_location](https://user-images.githubusercontent.com/29251855/37693586-9e369e20-2cfb-11e8-8a41-0da58a99aa23.png)
- 設定JAVA環境變數
我的電腦右鍵 > 內容 > 進階系統設定 > 環境變數
新增使用者變數輸入
JAVA_HOME C:\Java\jdk1.8.0_65
![java_home_windows7](https://user-images.githubusercontent.com/29251855/37694080-246f1258-2cff-11e8-8003-c42c9ac96348.png)
- 設定PATH 環境變數路徑
找到系統變數裡的path
在後面加上; 再輸入C:\Java\jdk1.8.0_65\bin
![java_binpath](https://user-images.githubusercontent.com/29251855/37694093-4732eaf8-2cff-11e8-918e-5271f79c1cda.png)
- 重新啟動Terminal, 輸入
java -version
確認java有正確設定
![java_verify](https://user-images.githubusercontent.com/29251855/37714336-46932eb4-2d54-11e8-9820-9cdc84c23042.png)
安裝 Android Studio
- 下載Android Studio最新版本
https://developer.android.com/sdk/index.html
![androidstudio_download](https://user-images.githubusercontent.com/29251855/37659452-03cc59b2-2c8b-11e8-927f-41feca995512.png)
- 安裝完成後啟動Setup Wizard
指定Android sdk安裝路徑C:\Android\sdk
![androidstudio_setup10](https://user-images.githubusercontent.com/29251855/37690078-c7fe95f4-2ce3-11e8-875d-93ca4bfa7ffa.png)
- Setup Wizard會配置下載其他套件
![androidstudio_setup14](https://user-images.githubusercontent.com/29251855/37690126-1a6c9962-2ce4-11e8-8467-594d4439a518.png)
- 設定Android 環境變數
開啟環境變數設定, 先增加一個系統變數ANDROID_HOME
![system_environment04](https://user-images.githubusercontent.com/29251855/37690208-81ffa1fa-2ce4-11e8-85de-52763dcdefa3.png)
接著在Path環境變數分別加上這些路徑
C:\Android\sdk\tools
C:\Android\sdk\platform-tools
%ANDROID_HOME%
![system_environment05](https://user-images.githubusercontent.com/29251855/37690248-b33310ea-2ce4-11e8-8685-4b64495ed396.png)
- 在命令提示字元輸入 adb, 確認能找到環境變數
![adb_check](https://user-images.githubusercontent.com/29251855/37690378-7abfef52-2ce5-11e8-8dfc-be104f330632.png)
設定Android模擬器
- 開啟Android Studio, 從Config開啟SDK manager
![androidstudio_setup16](https://user-images.githubusercontent.com/29251855/37690417-b715d200-2ce5-11e8-9399-54ea82a4c07e.png)
--
- 依照想測的環境去安裝不同版本的SDK
![androidstudio_setup17](https://user-images.githubusercontent.com/29251855/37690424-c65a33e6-2ce5-11e8-91ff-2f6fa41e5c2e.png)
- 接著啟動AVD Manager
我們需要新增一個Android Project
![androidstudio_setup21](https://user-images.githubusercontent.com/29251855/37690449-f34047e2-2ce5-11e8-9976-6707cd5058b6.png)
- 第一次開啟專案會出現提示有些元件還沒安裝
我們需要打開每個提示安裝直到沒有出現錯誤訊息
- 從Tools > Android > 啟動AVD Manager
![androidstudio_setup34](https://user-images.githubusercontent.com/29251855/37690494-2c0c1e34-2ce6-11e8-8bef-e2c0123f250f.png)
- 新增一個新的模擬器, 選擇Pixel
![create_avd02](https://user-images.githubusercontent.com/29251855/37690516-498549d6-2ce6-11e8-89d6-f623196f4d4b.png)
- 下載Android 6.0 system image
![create_avd03](https://user-images.githubusercontent.com/29251855/37690528-5cd20664-2ce6-11e8-85d6-81a3f0c99e19.png)
如果你在這裡出現提示要開啟Hyper-V 請你跟我這樣做...
安裝Intel Hardware Accelerated Execution Manager
這個套件是可以用GPU加速模擬器的執行速度
- 重新啟動電腦進入Bios
- 找到VTx or VTd相關選項, 改成
Enabled
![bios_hyperv](https://user-images.githubusercontent.com/29251855/37718370-84386c62-2d5d-11e8-87f8-5dbc1edee308.jpg)
重新開機後再進行下一步
- 從清單啟動Virtual device
![create_avd09](https://user-images.githubusercontent.com/29251855/37690576-cd02092a-2ce6-11e8-9921-8c325ac4f26d.png)
安裝 Appium client for Python
寫python test script要用到的Librarypip install Appium-Python-Client
設定Android手機
- 開啟手機上的工程模式
- 將手機用usb傳輸線連接到Mac上
檢查可以用adb tool與手機溝通ade devices
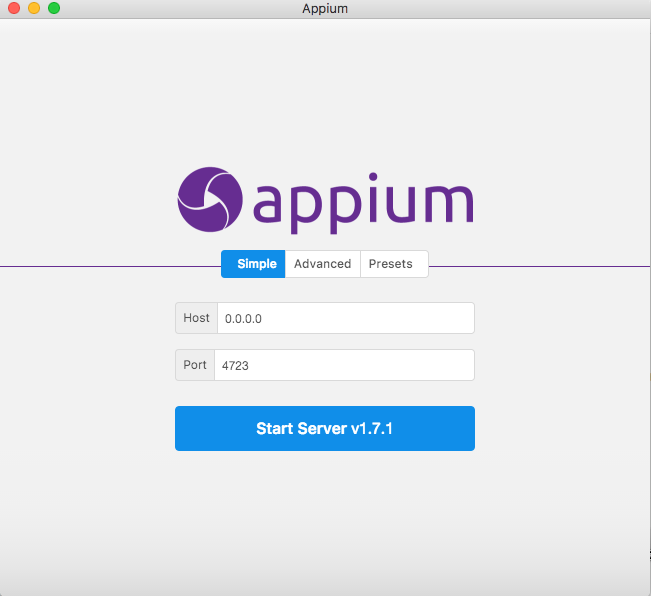
安裝Appium GUI Server
- 搜尋download Appium desktop
下載Appium-Desktop
- 啟動Appium desktop
![appium-desktop_launch](https://user-images.githubusercontent.com/29251855/37529809-05ffdc88-2973-11e8-8802-b81974ac2895.png)
由Appium GUI Server啟動Android模擬器
- 啟動Appium-Desktop
- Start Server
- 按右上角Search
- 開啟Android模擬器
- 輸入
adb devices
檢查device id
![emulator_check](https://user-images.githubusercontent.com/29251855/37690694-a7d49fc2-2ce7-11e8-8edd-41dddde6e35e.png)
- 輸入Desired Capabilities設定
"platformName": "Android", "platformVersion": "6.0", "deviceName": "emulator-5554", "noReset": true, "app": >".../ApiDemos-debug-2014-08.apk", "autoAcceptAlerts": true
- 驅動Android模擬器開啟測試App
![appium_launch2](https://user-images.githubusercontent.com/29251855/37690704-c064f424-2ce7-11e8-9875-8b3ad2ceb7c8.png)
由Appium GUI Server啟動Android手機
- 將Android手機接上Mac
- 輸入
adb devices
檢查device id
- 輸入Desired Capabilities設定
"platformName": "Android", "platformVersion": "5.1", "deviceName": "OPPO A39", "noReset": true, "app": >".../ApiDemos-debug-2014-08.apk", "autoAcceptAlerts": true
- 驅動Android手機開啟測試App
安裝與設定 Appium Console Server
我們之後寫的腳本都是要去啟動command line的Appium Server- 下載並安裝Node.js
https://nodejs.org/en/download/
![nodejs_windownload](https://user-images.githubusercontent.com/29251855/37715212-6c10569c-2d56-11e8-91c8-45c7b319886f.png)
--
- 使用Node指令安裝appium server
npm install -g appium
- 安裝appium-doctor
npm install -g appium-doctor
- 啟動appium console server
appium
![appium_consolelaunchwin](https://user-images.githubusercontent.com/29251855/37717805-42d290aa-2d5c-11e8-84b9-068b15f18447.png)
以上就是所有Appium在Windows環境的所有安裝步驟
Comments
Post a Comment